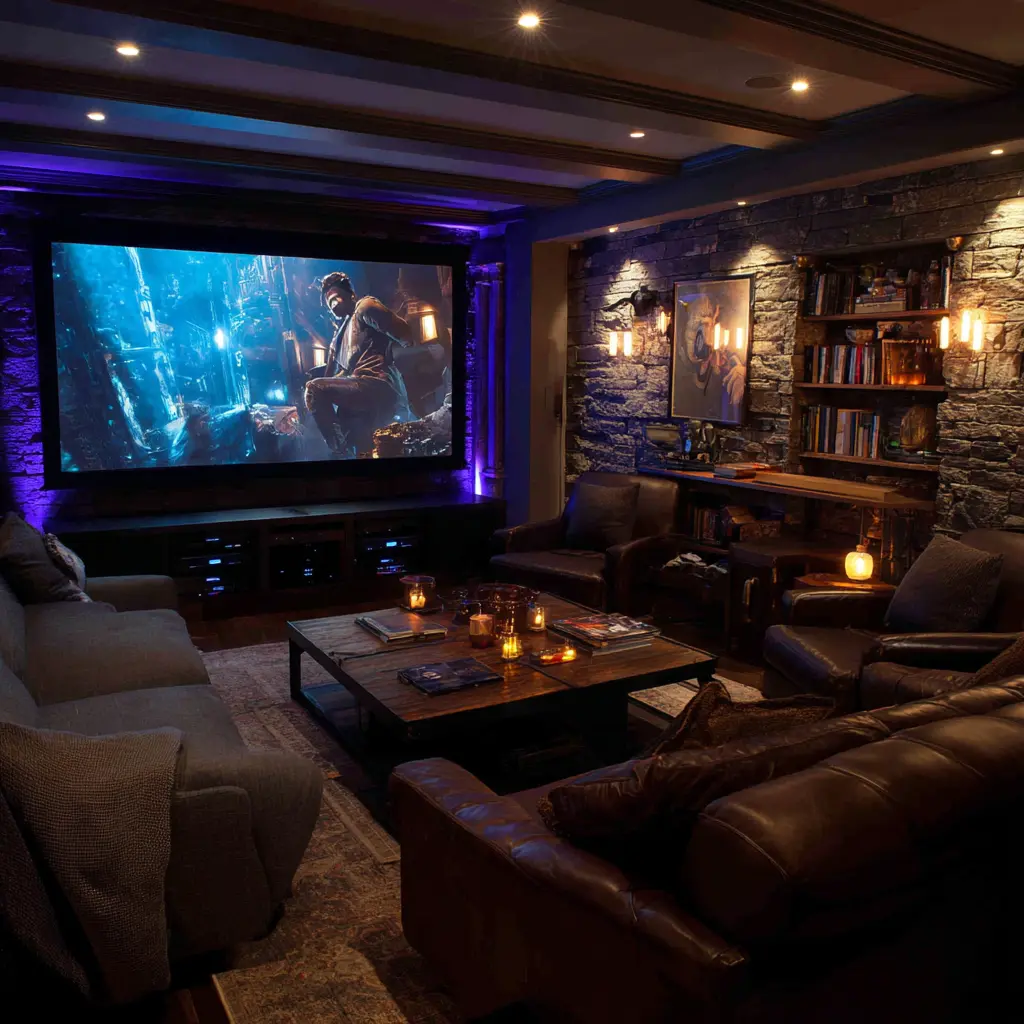
High ceilings look brilliant, but they often leave you with a frustrating problem: a huge amount of unused wall space above the normal furniture line. A standard media unit can sit nicely at eye level, but the room can still feel unfinished, and you miss out on storage that could genuinely improve daily living.
A bespoke media wall with overhead storage solves that. It turns height into something practical, keeps the wall visually balanced, and gives you a place to hide the things that usually end up scattered around the house.
In this guide, I’ll explain how floor to ceiling media walls work, what to consider before building one, and how we take a client’s idea from a simple conversation to a fully installed piece of joinery.
What is an overhead storage media wall?
An overhead storage media wall is a built-in media wall with storage that continues above the TV zone, usually up towards the ceiling line, with cupboards across the top. Instead of stopping at a standard height, the cabinetry uses the full height of the room.
When it’s designed properly, it doesn’t look like cupboards have been added as an afterthought. It looks like it belongs to the room.
Why overhead storage works so well in high-ceiling rooms
It balances the room visually
You need a large media wall in tall rooms otherwise furniture can look low and disconnected from the ceiling. A high ceiling media wall with top cupboards finishes the elevation, so the wall looks considered, not temporary.
It adds storage without taking floor space
If you’re short on storage, adding more cabinets down low can make a room feel crowded. Overhead cupboards increase capacity without reducing walkway space, which is why this approach works so well in tighter rooms too.
It keeps everyday clutter out of sight
Top cupboards are ideal for the bits you don’t need every day: board games, seasonal décor, spare cables, paperwork, throws, and the things that don’t have a home anywhere else.
It creates a proper built-in look
A floor to ceiling media wall tends to look more architectural. It feels like part of the house, not like a piece of furniture that could be moved tomorrow.
Design details that matter (from a joiner’s point of view)
1) Keep the TV position comfortable
A media wall should work for viewing first. The TV height needs to suit your seating. Overhead storage should support the design, not force the screen too high.
2) Get the depth right
High walls can tempt people to overbuild. Too deep and the wall dominates the room, too shallow and it looks flimsy. A solid rule is to keep overhead cupboards shallower than base cabinetry, so the top section feels lighter and the whole wall sits better in the room.
3) Make sure you can actually use the storage
If cupboards are right up near the ceiling, think about access. Some clients are happy with a small step stool. Others want a safer, more usable solution, which is where a fitted ladder can make sense. Done well, it looks intentional and turns nice to have storage into storage you genuinely use.
4) Keep door lines calm
Lots of doors can make a wall feel busy. Clean, consistent lines help. On modern media walls, integrated handles or minimal pulls usually look best, and they keep the joinery feeling more architectural.
5) Plan lighting to add warmth, not glare
A media wall is a large surface. Soft LED lighting in the TV recess or beneath shelves adds depth and warmth. The aim is atmosphere and usability, not bright strips in your eye line.
6) Plan services and ventilation early
If you have consoles, soundbars, routers, set-top boxes, or amps, plan for them. Cable routes, access panels, and ventilation are part of the joinery design, not something to fix afterwards. This is one of the biggest advantages of bespoke work: everything has a place and nothing looks messy.
7) Work with the ceiling shape, not against it
High ceilings often come with slopes, beams, or awkward transitions. A bespoke media wall can follow those lines so it looks intentional. This is where off-the-shelf media units fall apart.
Practical layout tips for high ceilings
You don’t need to be an interior designer to get this right, but you do need a bit of planning.
Break the wall into clear zones. A good overhead storage media wall usually has a comfortable TV zone at eye level, a base section for drawers and practical storage, and an overhead section that uses height without feeling heavy.
Use drawers where you want easy access. In the lower section, drawers are often the most useful storage because you can see everything. Cupboards can work too, but drawers tend to win for everyday items.
Hide the messy kit. If you’ve got equipment you don’t want on display, plan a dedicated cupboard with ventilation and easy access, rather than trying to hide it behind the TV and hoping for the best.
Leave room for movement and sound. If you are fitting speakers, a soundbar, or acoustic panels, plan the clearances. A media wall should make the room better, not introduce new problems.
What overhead cupboards are best used for
Overhead storage is ideal for items you want out of sight but still accessible: spare throws and cushions, seasonal décor, board games and kids’ items, tech boxes and cables, paperwork and household storage, and spare bedding in open-plan rooms.
If you want to store heavier items, the construction and fixings need to be designed for it. On tall joinery, proper fixing and structural planning is not optional.
Do you need a ladder?
Not always. But it can be a smart addition if the ceiling is very high, you want to use the top cupboards regularly, you prefer safe access rather than balancing on furniture, or you want the design to feel finished and intentional.
A ladder system can be integrated cleanly with a rail and made to suit the style of the room. It’s not just a visual feature. It’s what makes overhead storage genuinely practical in day-to-day life.
Materials and finishes that work best
A media wall is a large surface, so finishes matter.
Painted media walls are the most common because they can be colour-matched to the room and look clean and built in. Timber accents (oak, walnut, or veneered panels) add warmth and stop the wall feeling flat. This works particularly well around the TV recess, shelf edges, or ladder detailing. Modern options like matte finishes and minimal handles keep the look calm, especially in smaller rooms.
If you already have fitted furniture, we can match the style and finish so the media wall looks like part of a wider scheme rather than a standalone feature.
How we take a client’s idea and build a bespoke media wall
Most clients start with a simple idea: we want a media wall, or we want to use this height properly. Our job is to turn that into a design that works in the real world.
Step 1: Initial chat and rough brief
We talk through the room, ceiling height, what you want to store, and what the media wall needs to include. TV size, soundbar, consoles, fireplaces if relevant, and the overall style: minimal, timber detail, or a fully painted built-in look.
Step 2: Site measure and layout planning
Accurate measuring is everything with built-in joinery. We confirm wall dimensions, ceiling lines, skirting and coving details, slopes, and anything that will affect fit. Then we plan the layout: TV position, cabinet sizes, drawer heights, door lines, and where services need to run.
Step 3: Design sign-off
Before anything is built, you see a clear proposed layout. This is where we finalise materials and finish, handles, internal storage, lighting, and whether a ladder system is the right solution for your ceiling height.
Step 4: Workshop manufacture and assembly
All components are manufactured and assembled in our workshop. This is a key part of quality control. It allows us to pre-fit doors and drawers, confirm alignment, and make sure everything works smoothly before it ever reaches your home.
Step 5: Installation on site
Once the unit is ready, we bring it to site and install it properly. That means secure fixing, scribing where needed, clean alignment, and tidy finishing so it looks genuinely built in. If lighting is included, it is installed and tested as part of the job.
This workshop-to-install approach leads to a cleaner finish and a more predictable result. It’s how you get a media wall that looks effortless, even though it’s been planned down to the millimetre.


Common mistakes with high-ceiling media walls
Making the overhead cupboards too deep. Overhead storage should feel lighter than the base section.
Forcing the TV too high. Comfort comes first. Height doesn’t mean the screen should be near the ceiling.
Not planning cables and access. If services are an afterthought, you end up with visible wires and awkward equipment access.
Filling space without proportion. A wall can be full height and still look wrong if the lines, spacing and zones are not balanced.
Is an overhead storage media wall right for your home?
If you’ve got a high ceiling and you want the room to feel finished, overhead storage is one of the smartest upgrades you can make. It improves the look of the room, adds storage without eating floor space, and gives you a built-in feature that feels properly designed.
Ready to plan yours?
If you want a bespoke media wall with overhead storage, send over a photo of the wall taken straight on, the wall width and ceiling height, your TV size (and soundbar size if you have one), anything you want to hide inside the unit (consoles, router, amplifier), and your preferred finish (painted, timber accents, or both).
From there, we can recommend a layout that suits your room and turn your idea into a workshop-built installation that looks built in from day one.
Download Your Free Media Wall Buying Guide
Discover the Art of Media Walls: Download our FREE Media Wall Guide and unlock the secrets to selecting the perfect bespoke media wall for your home. Get expert tips, insights, and guidance to ensure a seamless and rewarding experience as you embark on your bespoke furniture journey. Don’t miss out – claim your guide now!